


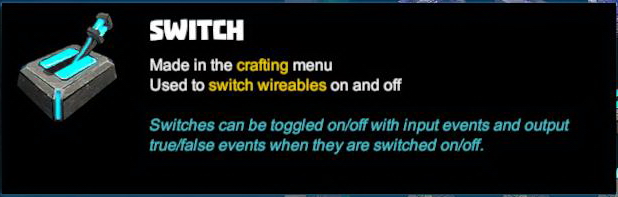
Basic Information[]
The basic Switch is a craftable activation device that can be used with many activatable objects to activate or deactivate them. Switches are Machines that belong to the Wiring System in Creativerse.
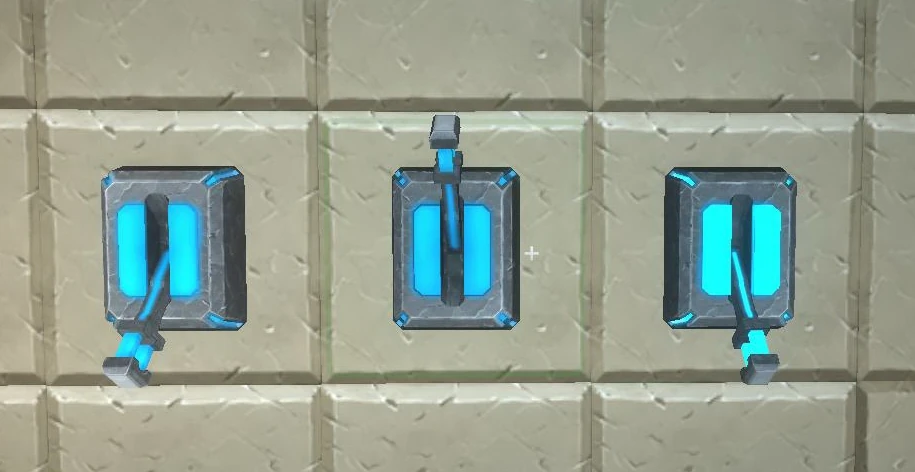
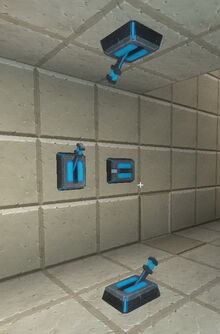
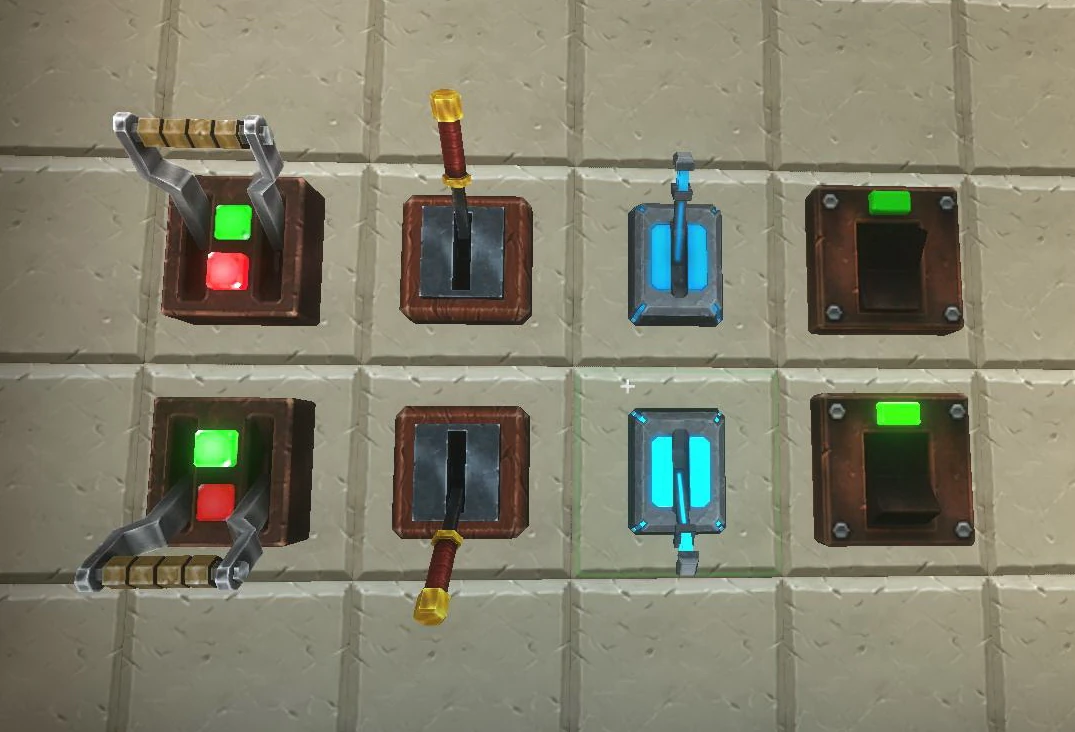
Common Switches can be crafted in the crafting menu (to be opened by typing "Q" as the default key) and look like levers in the typical Arctek design of Creativerse - the basic elements of the Switch look like they're made of grey stone with futuristic light blue parts on the panel at the base and also on the lever itself. The cyan blue patterns on the Switch will glow brightly when being activated and such can be seen from afar in the dark.
A Switch is a sender with one output connection indicated by the Send Hotspot ![]() that can be wired to activatable wireable objects like Doors, Wicket Gates, Lamps, Candles, Beacons, Fans (including Industrial Fans that cannot be passed through by player characters), Block Phasers, Mob Spawners, Loot Spawners, LEDs (also Galactic LEDs and Industrial LEDs), Campfires, Fire Pits and Iron Fire Pits, Trap Doors, Corrupt Obelisks, Snow Blowers, Gingerbread Chimneys, Industrial Bellows, Industrial Chimneys - and others like that.
that can be wired to activatable wireable objects like Doors, Wicket Gates, Lamps, Candles, Beacons, Fans (including Industrial Fans that cannot be passed through by player characters), Block Phasers, Mob Spawners, Loot Spawners, LEDs (also Galactic LEDs and Industrial LEDs), Campfires, Fire Pits and Iron Fire Pits, Trap Doors, Corrupt Obelisks, Snow Blowers, Gingerbread Chimneys, Industrial Bellows, Industrial Chimneys - and others like that.
These objects can then be opened/closed, switched on/off, activated/deactivated by using the Switch/es from a distance, even in opposite corners of the same game world.
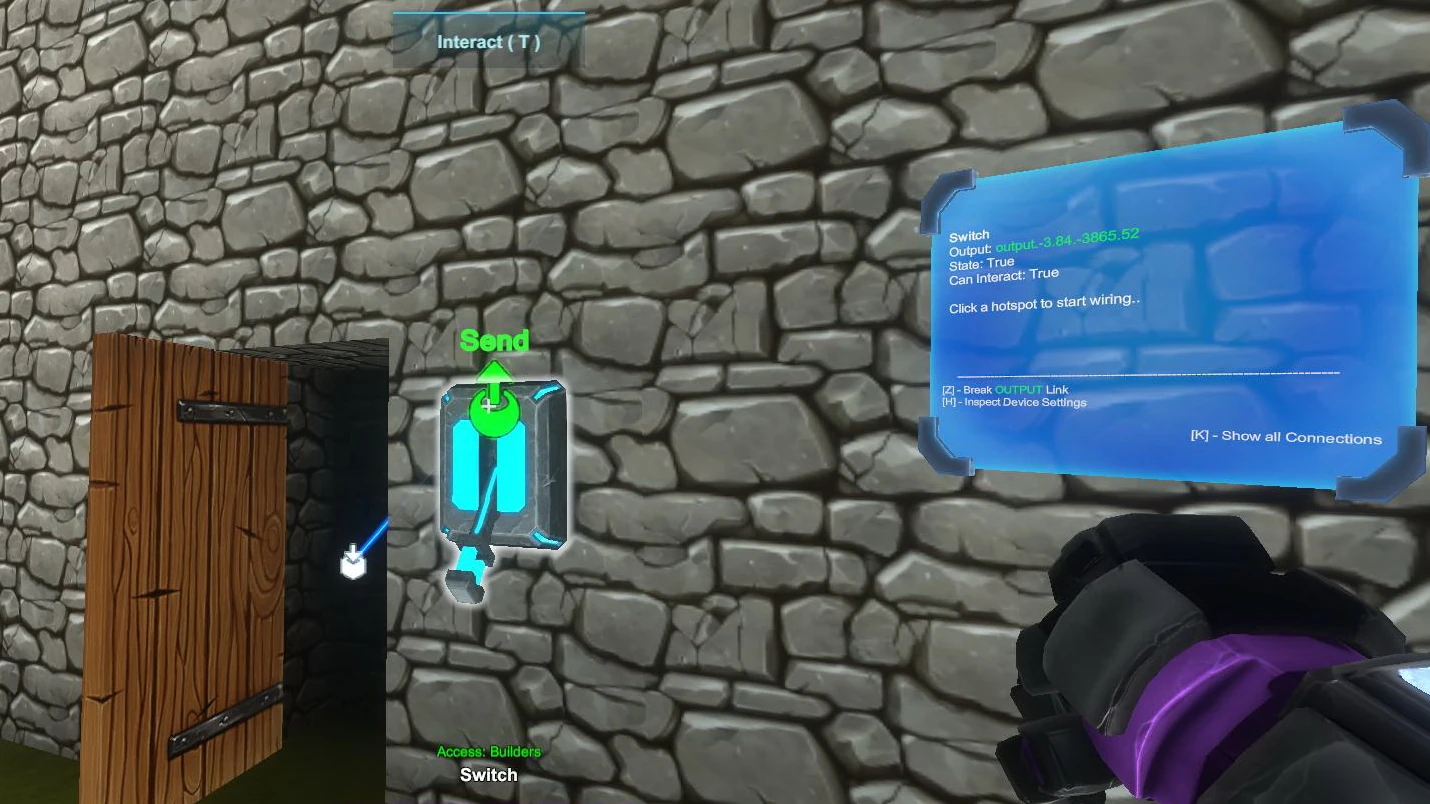
Wiring can only be done while having an Wiring Tool equipped. Only then you will be able to see the "Send" Hotspot when pointing your cursor at the Switch. With your Wiring Tool in hand, you can click on this "Send" Hotspot and then connect the blue wire to the "Receive" Hotspot of an activation device.
Optionally, operating gates can be wired in between, like Logic Gates, Flip-Flop Gates, Delay Gates, Inverter Gates and/or Number Comparison Gates. This enables players to lock activatable objects so that they can only activated/deactivated by certain codes that can be shared with specific players, or to create puzzles, to use timers, frequences and much more. For this, you'll have to connect the "Send" Hotspot of Switches to the "Receive" Hotspot of any operating gate/s that you can also link together to create Machines.
Alternatively, you can use code words in the "Sends" and "Receives" arrays for connection purposes to connect Switches to activatable wireable objects and/or operating gates.
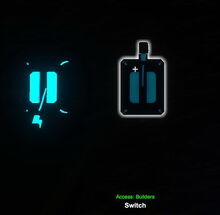
Switches do not have a "reset" option, unlike Pressure Plates and Number Pads. Switches can be activated/deactivated by all players including visitors, no matter the permission settings of the Switches, even on player claims and within Adventures. This also applies to Industrial Switches, Medieval Switches, Industrial Levers and Galactic Terminals. Disabling the option "can interact" will lock a Switch so it cannot be used even by its owner unless the option is activated again by using an Wiring Tool.
How to obtain[]
Basic Switches cannot be obtained from any Creatures nor can they be found in any randomly spawning Treasure Chests. Receiving already crafted Switches from other players or by buying them as part of any Item Packs will not provide you with their according crafting recipe.
Switches can be crafted in your Crafting Menu (to be opened by pressing "Q" as the default key), but only after the according crafting recipe has been unlocked for free.
How to unlock the crafting recipe[]
Before being able to craft a Switch, you will need to unlock the according crafting recipe for basic Switches by:
- crafting or obtaining a Stone Mining Cell (for example by killing or pet-harvesting a Keepa of any kind or finding these Power Cells in randomly spawning Stone Treasure Chests on Fossil layer blocks in the dark
- crafting or obtaining a Wiring Tool
- mining or receiving Magnetite - either mined from Caves, recesses near rivers or the Fossil layer underground close to the surface, which requires at least a Stone Mining Cell, or obtained from Warmworms, Night Rocksters or Pebbles by killing them or harvesting from them after taming and feeding them their favorite Food
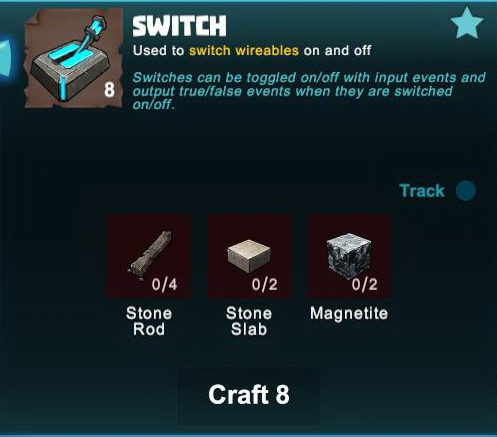
How to craft[]
To craft 8 basic Switches at a time, you'll need:
- 4 Stone Rods made of Stone, Limestone or Bedrock in a Processor
- 2 Stone Slabs, also made of Stone, Limestone or Bedrock in a Processor
- 2 (blocks of) Magnetite mined from the Fossil layer underground (accessible through Caves) with at least a Stone Mining Cell equipped, or obtained by killing or pet-harvesting Night Rocksters, Warmworms or Rockzillas
How to use[]
Switches have to be placed into the game world to be used. Then they can be toggled on or off by directly activating them. For activation, use "f" as the default key or click your right mouse button while pointing your cursor at the Switch you want to activate. However, of course Switches have to be wired to activatable objects to actually have an effect when being activated or deactivated.
You can fully rotate Switches into all directions by pointing your cursor at them, then pressing and holding R (as the default key) and then moving the mouse while holding down the left mouse button. The chosen rotation angle can be "locked" too by simply typing "r" while looking at an already rotated item, so that all items of the same stack in the chosen quickslot will then face the same direction when being placed.
Any Switch can output either a "true"-signal when it is switched/turned on (="true"), or a "false"-signal when it is switched/turned off (="false").
If Switches are switched "on", their "true" signal will activate the receiving object/s - a Door will open, a Lamp, Fan or Beacon will be turned on, etc. By turning off the Switch, the "false" signal will then deactivate the receiving object/s - a Door will close, a Lamp, Fan or Beacon will be turned off, etc.
If objects are already activated/open/switched on, but the Switch is deactivated and can only be switched on ("true" signal), then the already opened doors, activated fans, shining lamps etc. will not react. So you will have to use the Switch another time to actually switch it off again; because only if the Switch is turned off ("false" signal), the objects will be deactivated/closed/turned off. This general rule can be influenced with operating gates though.
A minimum permission rank can be defined for Switches, but please note that everyone can still activate/deactivate Switches no matter their permission rank. Players have to match or outrank the permission rank of the Switch in order to take this activation device or change its settings though.
Switches can be picked up by you without the need to equip any Power Cells if you match or outrank the permission level of the object that has been defined by its owner. Of course you won't be able to pick up such objects on game worlds, on player claims or in Adventures where your Permission rank is not sufficient (mainly when you are merely a visitor), which can only be changed by the owner of the game world, the respective claim owner or Adventure creator.
How to wire Switches[]
| Switches can be wired to any activatable object like doors, wicket gates, trapdoors, lightings, beacons, fans, block phasers, loot spawners, mob spawners and the like. You can also wire operating gates in between, like Number Comparison Gates, Delay Gates, Flip-Flop Gates, Inverter Gates, Logic Gates, etc. Switches can only serve as senders and can then be used as an activation device to switch on or off the activatable objects and/or the operating gates. |
To wire Switches, equip an Wiring Tool and point your cursor at the Switches that you have placed into the world. Their "Send" Hotspot ![]() will become visible then and you will be able to connect them to the "Receive" Hotspot of activation devices and/or of operating gates.
will become visible then and you will be able to connect them to the "Receive" Hotspot of activation devices and/or of operating gates.
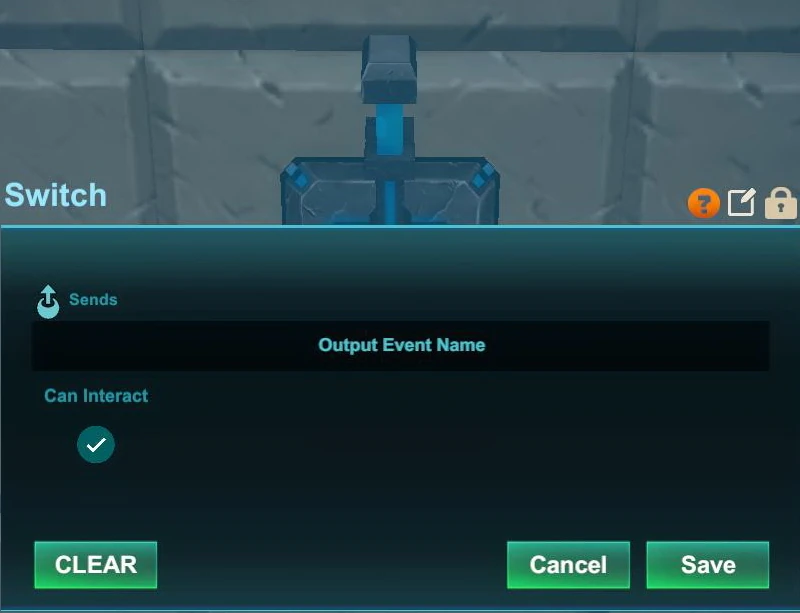
Type "n" (as the default key) to inspect the wiring window of the Switches if you wish to type a code word into the "Sending" array that you should then also use in the "Receiving" array of the activatable wireable objects and/or operating gate/s to connect them.
Different kinds of operating gates like Number Comparison Gates can be connected in between to define more exact (de)activation terms. For this purpose, connect the "Send" Hotspot of a Switch to the left "Receive" Hotspot of the operating gate, and then connect the "Send" Hotspot of the operating gate to the "Receive" Hotspot of the activatable wireable object/s.
You can change the settings of any operating gate/s to your liking. For Number Pads, it's advisable to write the prerequisited number code into the right input array (2) in their settings window and select "value" instead of "event".
Switches cannot receive any signals from other activation devices.
Interface (Menu)[]
To open the Switch interface window, you will have equip an Wiring Tool and then press the key "n" (as the default key) while pointing at the Switch in the game world with your cursor.
Using this interface window, you can:
 click on this icon to rename the Switch to any another description up to 30 characters
- click on this icon to change the permission settings of the Switch so that only players with a specific or higher permission rank than this defined permission level can take the Switch. Switches can be activated by anyone though without regard to their permission rank, even if they are mere "Visitors"!
- toggle manual interaction - the Switch can be "locked" by disabling the "can interact" button. Then any player, including you as the owner of the Switch, will not be able to use the Switch directly, but only after unlocking it again, which requires the minimum permission level for players that you can define for this Switch by using the padlock icon
- for easier wiring purposes, you can write a code word into the output array ("Sends") here, and then write that same code word into the input array ("Receives") of an activatable wireable object that can even be placed far away