


Basic Information[]
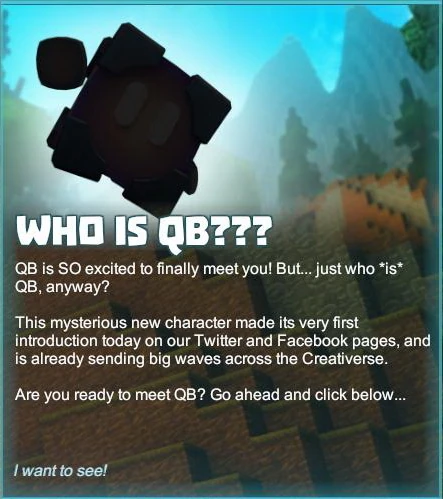
QB is your personal Quest Block friend / guide that was added to Creativerse with patch R54 on May 1st 2018 "Questing with QB".
On August 22nd 2018, an intro was created for Creativerse that is shown when players create a new world for the first time. In this intro, it is revealed that player characters meet QB as soon as they awaken on a Creativerse world and put on the ArcTek Gauntlet.
For now, QB is not some kind of NPC that you could meet in any game world, instead you can find QB in your Codex / Quest Window as well as displayed next to your quickbar. QB is the one who voices system messages in the chat and greets you with fourth-wall-breaking comments on the main screen when logging into the game as well.
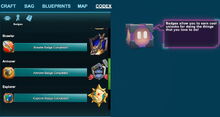
Appearing as an animated cube with a friendly face and arms capable of waving, this cubic quest block will ask you to complete quests that will both give you rewards and help you move through the world doing the right things first.
In the second Tab of the Codex, your cubic companion QB also keeps track of you process at gaining Badges that you can unlock by questing. The Help files that can be found in the Codex are obviously also QB's humorous (and thus sometimes not overly helpful) explanations.
Does QB prefer to be addressed by "he", "she", "it", "they" or a completely unique pronoun maybe? Playful said that this is up to the players to decide - write your suggestion on social media or the official forums, if you are interested in granting QB any certain pronoun or gender!
QB seems to be a sentient being made of highly advanced Arctek technology, just like your trusted gauntlet that is powered by Mining Cells, the Arctek Lightings, Arctek Chests, Crafting Stations as well as all the Machinery in Creativerse - and very likely Pixi too. Nonetheless, QB has a vast knowledge of the pop culture here on Earth and loves to refer to it in comments.
How to find QB[]
You can find QB by pressing the key "x" (as the default key) or by either opening your inventory, map or crafting menu. There you can find a Tab called "Codex" that you can click on, right above the opened window to the right side of the Tab "Map".
Even though QB is also displayed on the main game screen to the left side of your quickbar, you cannot activate QB nor the Codex by clicking on their icons there with your mouse cursor unlocked.
How QB can help you[]
When consulting QB by opening the codex, QB will ask you to do a variation of possible actions in Creativerse and will afterwards reward you for each completed task with useful equipment, consumables, crafting materials, now and then with placeable Treasure Chests and even with Coins for the Store. QB will also add comments and hints to each of the quests that you have started.
Additionally, QB will reward you with Badges that will be unlocked and grant their buffs automatically after you've fulfilled all of the quests that are related to a specific Badge.
You are not obliged to take on any Quests - however it is recommendable to do so, because these Quests make a good tutorial for new players, will introduce you to many features of the game, will let you progress faster through the game with the help of the item rewards, will grant you helpful buffs via unlockable Badges and will also let you earn 50 Coins for the Store for each of the 7 "Rookie" Badge quest (350 Coins in total).
On May 1st 2018, QB initially had 43 quests to offer in the Codex that you can take on one after another (and sometimes even more than one that you can work on parallel).
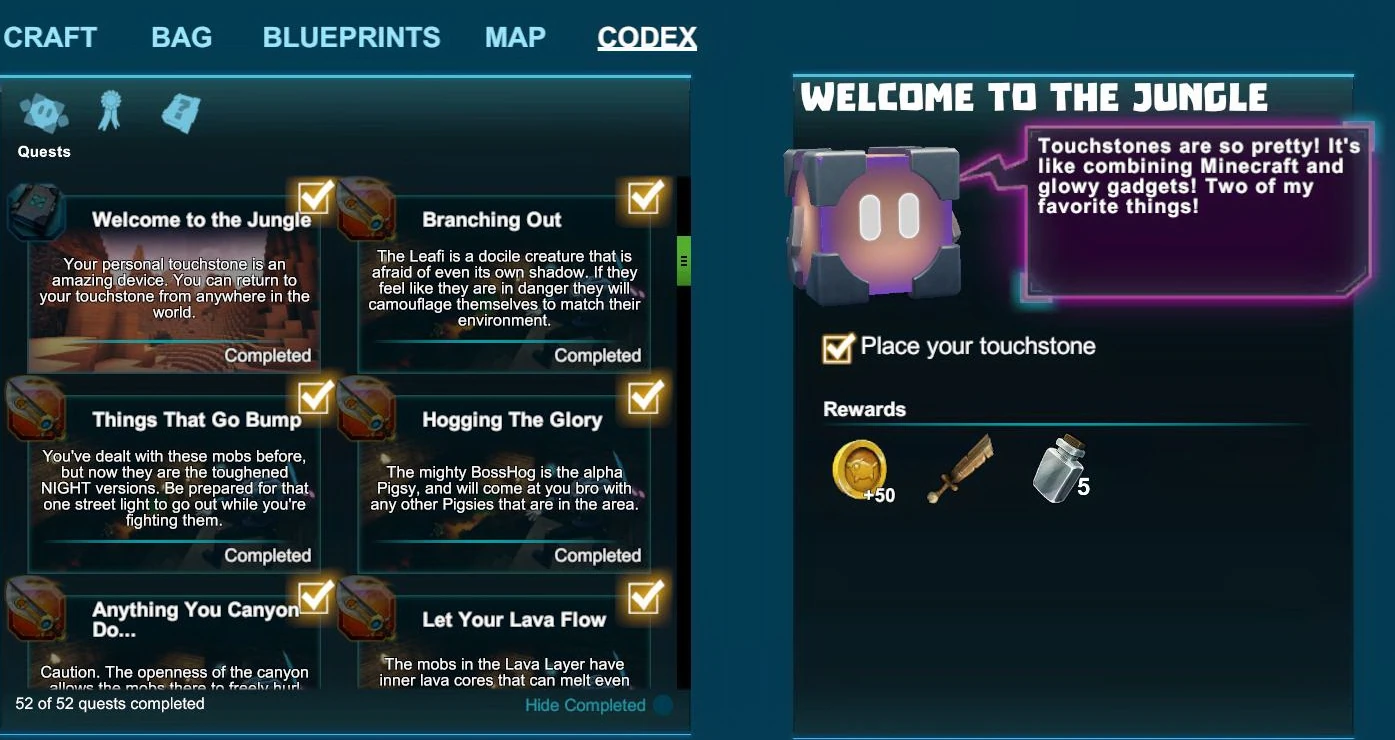
With update R58 on December 19th 2018, 9 more quests about Taming were added with the Elfi's Wonderland update, so there are now 52 quests in total in Creativerse.
Up to 8 Badges can be unlocked by questing now and will grant your player character permanent buffs on all game worlds.
Since update R59 on January 31st 2019, QB's voice can be turned off (or on) in the Audio Options.
How to start questing[]
Since May 24th 2018, new players will automatically be shown their very first quest "Welcome to the Jungle" (with the task to place your Touchstone) as a tracking note in the left bottom corner of their screen.
You can access your quest menu by pressing the key "x" (as the default key) or by opening your inventory, map or crafting menu, where you can find a Tab called "Codex" right above the window to the right side of the Tab "Map". Click on the word "Codex" to access the quest menu. The Codex will show your list of open and completed quests by default, while you can access your Badge list by clicking on the medal icon.
In this window you will also find QB, your friendly cubic quest companion who is the one asking you to fulfill these tasks and will grant you the rewards as well as the Badges.
Completing the first quest (by placing your Touchstone - or picking it up and placing it once again if you have already placed it) will initiate the whole quest chain, so you won't have to accept each single Quest after that.
Instead, simply by confirming the completion of any Quest and accepting the rewards, a follow-up Quest or even more than one following Quest will automatically be unlocked and started.
Follow the instructions in the Codex for each quest to complete it accordingly.
Quests (and Badges) are Steam account-bound, they can only be completed once by each player, no matter on which game world. You can change to any other Creativerse game world and continue to work on your current quests there anytime if you like.
You can optionally track your quest progress similar to how you can track unlocking requirements and crafting ingredients by enabling the small round "track" option button in the bottom right corner of the selected quest window in the Quest Menu, the Codex. By that you will be shown the description and progress of your current quest/s (up to 3 quests can be tracked parallel) on the left border of your game screen.
If your Codex icon on the game screen to the left of your quickbar says "None" and your quest tracker displays "Press None to complete quest and collect rewards!" then you have assigned the default key "x" to another action already, leaving the Quest Menu with no specific key assigned. You can assign any key you like by pressing "Esc", selecting "Game Settings" and then clicking on the "Control" Tab above. Scroll down to find and define your preferred key for "Codex". Or simply access your Quest Menu by clicking on the "Codex" Tab from your inventory, map or crafting menu.
Don't forget to complete your quests after you've fulfilled all their tasks in the Quest Menu by selecting the according quest there and clicking on the green "Complete" button in order to receive your rewards! Also, make some space for these items in your inventory beforehand.
One unlocked Badge can be "equipped" at the right side of the inventory window by clicking on the icon that looks like a white crossed-out circle right next to the word "Costume" over your pauldron equipment slot.
However, all unlocked Badges will automatically grant your player character their permanent buffs, no matter which Badge you will select to be displayed next to your character's name for other players to see.
Any portable Treasure Chests that you will receive will have to be placed and opened to get random items similar to randomly spawning Treasure Chests of the same kind.
Warning[]
When playing together with other players, the multiple quest trackers might interfere. If your quest tracker should suddenly change and indicate a totally different quest from the one/s active in your Codex (quest window), then please deactivate the tracker for the affected quest/s and reactivate it again, this will reset and fix it.
How to complete quests[]
Follow the instructions for each quest that you can find in the Codex when clicking on the according quest image to complete it accordingly. You can find some additional tips for each Quest further below in this article in the quest list.
After you've fulfilled all steps, don't forget to complete your quest/s in the Quest Menu by selecting the according Quest and clicking the green "Complete" button in order to receive the according rewards! Also, make some space for these items in your inventory beforehand.
Crafters' quests:
If crafting quests ask you to craft an item, then you can often simply take this item out of storage if you have already crafted it before. However, in order to fulfill the Quest correctly, you might sometimes actually have to craft the specific item in your crafting menu (to be opened with "q" as the default key).
The requested item will be marked with a codex icon in your crafting menu to let you find it quicker and avoid any ambiguity errors.
Collectors' quests:
Harvesting quests usually can be alternated by finding the required items (like Red Mushrooms for example) in a randomly spawning Treasure Chest, by being given the items by another player or by simply taking the items out of a storage container/chest if you have already collected some of these items.
Explorers' quests:
Already discovered items etc. will automatically count in retrospective for this quest! It also does not seem necessary to actually visit the specific Biomes or Layers that exploration quests suggest. You can optionally collect the plants, blocks or materials in question in order to "discover" them wherever you may find them; like from randomly spawning Treasure Chests, from fellow players or from Creatures as a loot or Pet-harvest.
Fighters' quests:
As for kill-quests - you will have to use melee Weapons and/or Explosives to defeat the Creatures in question. Simply obtaining Loot Bags (like from Creatures that were killed by drowning, freezing, corruption, purification or burning like in kill-traps that you can build for this purpose) will not count. However, you can build a kill-trap that will allow you to hit the Creatures yourself additionally (through a Fence for example) in hopes that you will be able to deal the finishing blow before the Creatures will die from the liquids etc. in the trap. Actually it might be a better idea to build or modify traps that will simply capture, but not kill Creatures for kill-quest purposes.
You do not have to kill Creatures in the specific Biomes or Layers that the quests suggest, instead you can hunt them wherever these Creatures might appear - and you can build artificial biomes from natural blocks that can make hunting Creatures more comfortable and safer. However, you cannot improperly use Mob Spawners, since Creatures spawned with this machine will not count for quests.
Badges[]


In your quest window ("Codex") you can find two subcategories, accessible by clicking on the small icons. The first (an open scroll with an exclamation mark in the middle) is QB's list of Quests, and the second (a medal with straps) is a list of Badges that you can unlock by fulfilling quests.
Each quest belongs to a certain category associated with a specific Badge. Whenever you will complete a quest, the progress will be counted and displayed on the according slider of its category in the Badge window.
As soon as all of the quests of one category have been completed (and confirmed by you in the Quest Menu = Codex), the assigned Badge of this category will be activated. The buff related to this Badge (as described in the Badge window if you hover your mouse cursor over the icon of the Badge) will automatically and permanently be granted to your player character on all game worlds.
You do not have to confirm or do anything in order for the Badges to be unlocked, they will automatically unlock and grant their buff as soon as you have completed their related quests.
Additionally, you can choose one of your unlocked Badges to be displayed next to your character's name for other players to see if you like that. To select an unlocked Badge, open your inventory and click on the icon to the right side of your character equipment next to the word "Costume" over your pauldron slot.
On May 1st 2018, 7 Badges were introduced:
- Rookie (after fulfilling 7 quests, player characters can stay under water for some more seconds before starting to drown and take damage)
- Ruffian (after fulfilling 8 quests, player characters will be healed for 8 seconds if their health drops below 30% = 332 health points or less)
- Brawler (after fulfilling 8 quests, players can randomly accomplish a critical hit that will inflict more damage while fighting with a melee Weapon)
- Cavedweller (after fulfilling 5 quests, falling damage is reduced for the player character on all game worlds)
- Homesteader (after fulfilling 5 quests, player characters will take less freeze damage from cold damage attacks or environmental temperatures near/on Snow or Ice after the white cold gauge has filled)
- Explorer (after fulfilling 4 quests, player characters will take less Corruption damage from corruption damage attacks or environmental effects near/on Corrupted Blocks after the violet corruption gauge has filled, or from Corrupted Water right away)
- Armorer (after fulfilling 4 quests, the physical damage taken from animals hits and the melee weapons of player characters is permanently reduced, which is not reflected in armour defence points)
On December 19th 2018, 1 more Badge was added to the game:
- Rancher (after fulfilling 9 quests, the timespan required to tame Creatures will be greatly reduced: 1 second instead of 5 seconds, 1,5 seconds instead of 7,5 seconds, 2 seconds instead of 10 seconds, 3 seconds instead of 15 seconds, 5 seconds instead of 25 seconds, 6 seconds instead of 30 seconds).
List of quests[]
Welcome to the Jungle[]
- Badge: Rookie
- Unlocked by: clicking on "Accept" to start this first quest
- Objective: place your Touchstone from your quickbar on the ground. If you have placed it already, teleport to your Touchstone (default key "t"), pick it up and place it anew. If you want to relocate it, go to where you want to place your touchstone next, press "t" (or your assigned custom key) again and click on "reclaim" to retrieve your Touchstone from wherever it was on the game world.
- Rewards: 1 crafted Wood Sword, 5 crafted Basic Health Potions and 50 Coins
- Unlocks: quest "Mushroom For Error"
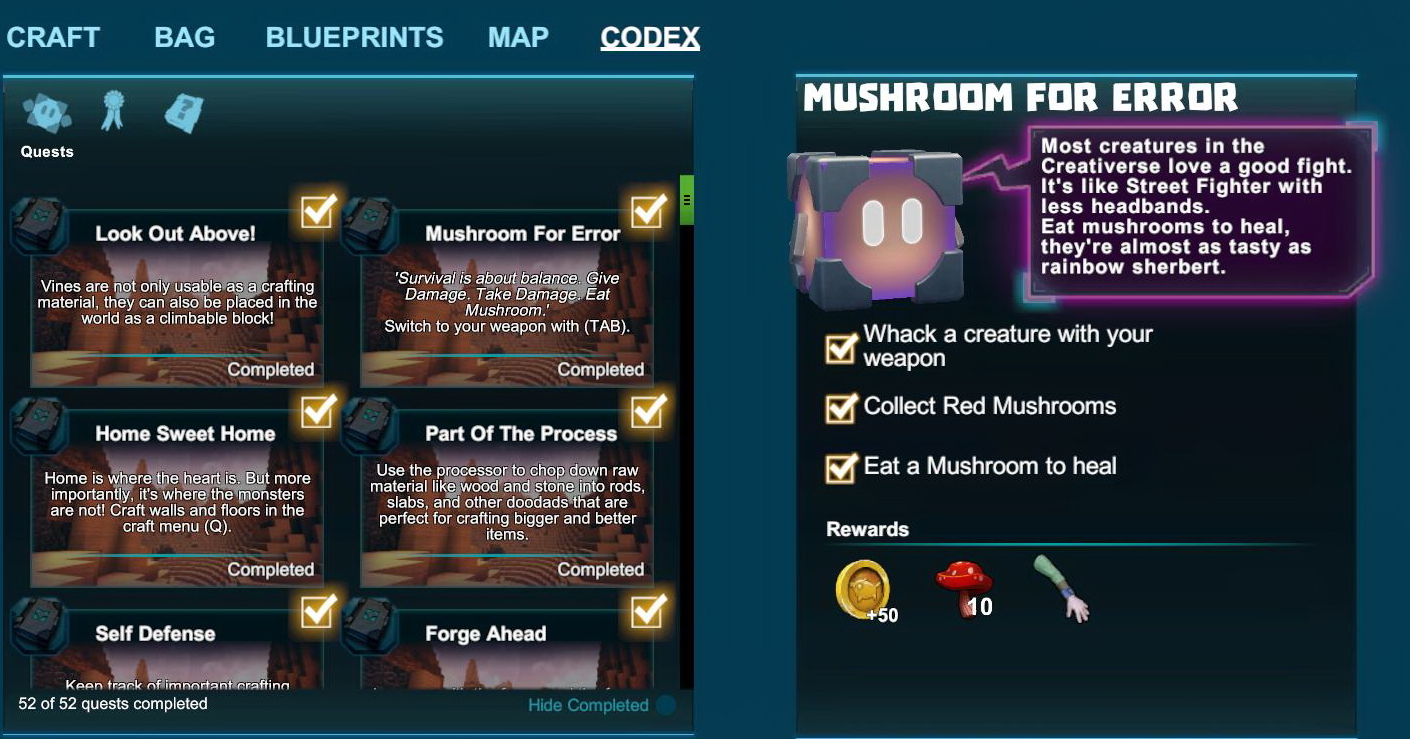
Mushroom For Error[]
- Badge: Rookie
- Unlocked by: completing the quest "Welcome to the Jungle"
- Objectives:
- whack any Creature (like a Leafi for example) with a melee Weapon (like the Wood Sword that you have obtained by completing the prior starting quest),
- collect 5 Red Mushrooms (like from Forests, Grasslands or Wood Treasure Chests), and
- eat any Mushroom (Red, Brown or Glowing) to heal. To eat a Mushroom, activate it from the quickbar with right-click or typing the number of the dedicated quickslot twice.
- Rewards: 10 Red Mushrooms, 1x Leather Armguards and 50 Coins
- Unlocks: quest "Home Sweet Home"
Home Sweet Home[]
- Badge: Rookie
- Unlocked by: completing the quest "Mushroom For Error"
- Objectives:
- craft 20 Wood Wall blocks from any type of natural Wood blocks taken from trees or Wood Treasure Chests in your crafting menu (to be opened with the default key "q"), and
- place these 20 blocks of Wood Wall anywhere (you can take them up again if you like without suffering any negative effects). Attention: Wood Wall blocks are flammable. As a positive side note, you can use them in your Forge as Fuel.
- Rewards: 20 Wood Floor blocks, 12 Wood Windows, 1x Leather Leggings and 50 Coins
- Unlocks: quests "Look Out Above" and "Branching Out"
Look Out Above[]
- Badge: Rookie
- Unlocked by: completing the quest "Home Sweet Home"
- Objectives:
- collect 5 Vines, like from Loot Bags of Leafis of any type, or from Cragwood trees (that grow in many Biomes) or Wildwood trees (that only grow in Jungles),
- collect 5 Flowers of any type like from Wood Treasure Chests or from many trees, and
- collect 5 blocks of Beeswax from Wood Treasure Chests or from many tree tops
- Rewards: 10 Red Flowers, 10 blocks of Beeswax and 50 Coins
- Unlocks: quest "Part Of the Process"
Branching Out[]
- Badge: Ruffian
- Unlocked by: completing the quest "Home Sweet Home"
- Objective: defeat 10 common bright green daylight Leafis anywhere - they spawn during the day in Grasslands, Woodlands, Forests, Tundras, on Elderwood tree Leaves in Taigas, close to bush-like small trees in Canyons and in many other Biomes. The Leafis must be defeated with a melee Weapon and/or Explosives. Other variants of Leafis like dark green Mossy Leafis or Night Leafis as well as Leafis spawned with a Mob Spawner will not count for this quest.
- Rewards: 20 Leafi Leaves and 20 Sinews
- Unlocks: quest "Pig Up The Pace"
Pig Up The Pace[]
- Badge: Ruffian
- Unlocked by: completing the quest "Branching Out"
- Objective: defeat 10 common yellow daylight Pigsies anywhere with a melee Weapon and/or Explosives - they spawn during the day on nearly all surface Biomes and also on artificial Biomes made from natural blocks like common green Grass. Other variants of Pigsies like Night Pigsies will not count. Also Creatures spawned with a Mob Spawner won't do for this quest.
- Rewards: 20 pieces of Leather and 10 Bones
- Unlocks: quest "Let's Go To The Beach"
Part Of the Process[]
- Badge: Rookie
- Unlocked by: completing the quest "Look Out Above"
- Objectives:
- collect a common gray Stone block from anywhere like from hillsides or cliffs, from recesses near rivers, from digging downwards a bit, from rocky Mountains or from Caves (no Power Cell is required),
- craft a Processor in your crafting menu from 8x Stone, 8x Wood and 2x Vines,
- obtain 2 Wood Slabs like by cutting natural blocks of Wood in a Processor
- Rewards: 20 blocks of common Stone, 20 Vines, 1 Leather Pauldron and 50 Coins
- Unlocks: quests "Self Defense", "Block and A Hard Place", "Bricks by Bricks" and "We Scout Here"
Self Defense[]
- Badge: Rookie
- Unlocked by: completing the quest "Part Of the Process"
- Objectives:
- collect 3 Bones as a random drop or pet-harvest from any Creatures or by processing blocks of Fossils in a Processor
- put Vines into a Processor to receive Twines, or take them from your storage if you have already processed Twines, or get Twines from a friend
- craft a Stone Sword in your crafting menu from 3 Stone blocks, 3 Bones, 2 Wood Rods and 1 Twine
- Rewards: 1 Leather Breastplate and 50 Coins
- Unlocks: might be one of the unlocking requirements for "Forge Ahead", but only when the quest "Block and A Hard Place" is also completed
Block and A Hard Place[]
- Badge: Cavedweller
- Unlocked by: completing the quest "Part Of the Process"
- Objectives:
- craft at least one basic Extractor from Stone Slabs and Wood Slabs in your crafting menu
- obtain 5 pieces of Coal, for example by extracting it from Coal Nodes that can be found in shallow Caves, on the Fossil layer or on rocky Mountains, or find Coal in Wood Treasure Chests or loot or pet-harvest Coal from Keepas of any kind
- craft a Stone Mining Cell in your crafting menu from 4 Stone blocks, 2 Wood Slabs, 2 Mushrooms, 5 pieces of Coal and 2 Flowers of any type
- Rewards: 5 basic Extractors, 20 pieces of Coal and 10 Coal Torches
- Unlocks: quest "Forge Ahead" and quest "A Stalactite Squeeze"
Bricks by Bricks[]
- Badge: Builder
- Unlocked by: completing the quest "Part Of the Process"
- Objectives:
- get any Blueprint from the Blueprint window (you can find the Tab when opening the inventory, crafting menu or map). It is recommended to choose a small Blueprint from the workshop made of only a few blocks to finish the quest quickly, but you can use the opportunity to build your first house or you can alternatively create a Blueprint yourself with a Small Capture Block
- place the cornerstone of this Blueprint
- and finish building the Blueprint
- Rewards: 5 Small Capture Blocks, 5 Medium Capture Blocks and 5 Stone Treasure Chests
- Unlocks: quest "Rome Was Nothin' "
We Scout Here[]
- Badge: Explorer
- Unlocked by: completing the quest "Part Of the Process"
- Objectives:
- discover Red Flowers (you already got them as a reward for a prior quest, so this should be unlocked already),
- discover Lilypads for example by harvesting them in Swamplands, and
- discover blocks of Detritus that the ground in Jungles consist of. Beware of aggressive poisonous red Feral Pigsies during the day in both Swamplands and Jungles!
- Rewards: 10 Poison Bombs, 10 Poison Resistance Potions, 10 Basic Health Potions and 2 Stone Treasure Chests
- Unlocks: quest "High and Low"
High and Low[]
- Badge: Explorer
- Unlocked by: completing the quest "We Scout Here"
- Objectives:
- discover Wildflowers for example by harvesting them from the ground of Savannah biomes (not to be mistaken with Wildwood Flowers from Jungles), or by looting or pet-harvesting them from Dried Leafies
- discover caramel-brown Canyonstone high up in Canyons (not to be mistaken with Dark Canyonstone or Ruddy Canyonstone),
- discover Seashells by looting or pet-harvesting them from Pebbles or by picking them up from blocks of Sand where they continually spawn, and
- discover/collect Cactus Flowers that will slowly grow by themselves on blocks of Cactus.
- Rewards: 10 Fire Bombs, 10 Fire Resistance Potions, 10 Basic Health Potions and 2 Stone Treasure Chests
- Unlocks: quest "Finding Your Cool"
Finding Your Cool[]
- Badge: Explorer
- Unlocked by: completing the quest "High and Low"
- Objectives:
- discover Autumnwood Flowers like by looting or pet-harvesting them from Autumn Leafies or collecting them in Forests from Autumnwood trees that have Leaves of 3 different colors; reddish, brownish and yellowish,
- discover Ice (requires at least a Stone Mining Cell or better to be picked up) by collecting it on frozen plains, in Taigas or rarely at the entrance of Caves high up in the Mountains, or create Ice from Water (or even better Bog Water) by placing the liquid into very cold areas high up or using Snow Blowers
- discover Tundra Flowers by collecting them from the ground of Tundra Biomes on Dead Grass
- discover Elderwood by collecting this natural wood from the trunk of pine-like Elderwood trees in Tundras, Taiga, in valleys between Mountains, or from rare giant "deciduous" looking Elderwood trees in Savannahs
- Rewards: 10 Freeze Bombs, 10 Freeze Resistance Potions, 10 Advanced Health Potions and 2 Obsidian Treasure Chests
- Unlocks: quest "No Block Unturned"
No Block Unturned[]
- Badge: Explorer
- Unlocked by: completing the quest "Finding Your Cool"
- Objectives:
- discover blocks of Fossils (requires no Power Cell to be mined) by collecting them in Caves of the Fossil layer or by digging downwards yourself, or at recesses near rivers in Mountains, or by looting or pet-harvesting Warmworms or Dustevils
- discover Glowing Mushrooms on the Stalactite layer (requires at least an Obsidian Mining Cell or better to be mined) or by looting or pet-harvesting common blue-green Mirus
- discover blocks of Sulfur on the Lava layer (requires at least an Obsidian Mining Cell or better to be mined) deep underground
- discover blocks of Corrupted Leaves (requires at least a Diamond Mining Cell or better to be mined) either on the Corruption layer or corrupt any type of common leaves except for Elderwood Leaves and Ashenwood Leaves with Corrupt Bombs
- Rewards: 10 Healing Beacons, 10 Corruption Resistance Potions, 10 Health Regeneration Potions and 2 Diamond Treasure Chests
- Unlocks: Explorer Badge that grants reduction of Corruption damage
Let's Go To The Beach[]
- Badge: Ruffian
- Unlocked by: completing the quest "Pig Up The Pace"
- Objectives:
- defeat 10 Pebbles that spawn during the day on blocks of Sand near Water preferably with Seashells nearby with a melee Weapon and/or Explosives. As always, Creatures spawned with a Mob Spawner will not count for quests.
- defeat 5 common red Rocksters that spawn during the day on blocks of Sand near Water or other liquids. Other types of Rocksters like Night Rocksters will not count for this quest.
- Rewards: 20 Rockster Rocks, 20 Pebble's Pebbles and 1 Wood Treasure Chest
- Unlocks: quest "Who's The Chicken?"
Forge Ahead[]
- Badge: Rookie
- Unlocked by: completing the quest "Block and A Hard Place" and most likely also requires the quest "Self Defense" to be completed as well
- Objectives:
- craft a Forge in your crafting menu from 6 blocks of Bedrock, 6 Wood Slabs and 6 Stone Slabs
- place this/a Forge into the game world
- obtain 10 Obsidian bars, for example by forging Obsidian Ore together with some Fuel (like Wood Rods, Leaves or Coal)
- Rewards: 1 more Forge, 20 Obsidian Ore and 50 Coins
- Unlocks: quest "Obsidian Dreams" and "Green Thumb", unlocks the Rookie Badge that grants additional breathing time underwater (as well as in any other liquids)
A Stalactite Squeeze[]
- Badge: Cavedweller
- Unlocked by: completing the quest "Block And A Hard Place"
- Objectives:
- collect 10 Obsidian Ore, for example by extracting it from Obsidian Nodes found in shallow Caves, on the Fossil layer, on Mountains or found in Iron Treasure Chests or Diamond Treasure Chests
- collect 10 blocks of Magnetite, like by mining it from the Fossil layer accessible through Caves (Magnetite requires at least a Stone Mining Cell or better to be mined), or by looting or pet-harvesting Warmworms, Night Rocksters or Rockzillas, more rarely common Rocksters
- craft an Obsidian Mining Cell in your crafting menu from 4 Obsidian bars, 2 Stone Slabs, 10 blocks of Bedrock, 8 blocks of Magnetite and 4 Mushrooms
- Rewards: 5 Advanced Extractors, 10 Iron Bars and 10 Wood Burning Lamps
- Unlocks: quest "Iron And Mine"
Rome Was Nothin'[]
- Badge: Builder
- Unlocked by: completing the quest "Bricks By Bricks"
- Objective: get, place and complete 5 Blueprints (or one Blueprint 5 times)
- Rewards: 20 Super Excavators, 5 Large Capture Blocks and 5 Diamond Treasure Chests
Iron And Mine[]
- Badge: Cavedweller
- Unlocked by: completing the quest "A Stalactite Squeeze"
- Objectives:
- collect 10 Glowing Mushrooms, for example by mining them from the Stalactite layer (requires at least an Obsidian Mining Cell or better) or by looting or pet-harvesting from common blue-green Mirus
- collect 10 Iron Ore, for example by extracting it from Iron Nodes on the Stalactite layer or finding it in Iron Treasure Chests or Diamond Treasure Chests or painstakingly loot or pet-harvest the rarely dropping Ore from Hot Feet and Warmworms
- craft an Iron Mining Cell in your crafting menu from 4 Iron Bars, 2 Obsidian Slabs, 8 blocks of Saltrock from the Stalactite layer, 8 Glowing Mushrooms and 4 Seashells
- Rewards: 20 Advanced Extractors, 10 Iron Bars and 10 Arctek Torches
- Unlocks: quest "Who Turned Off The A/C?"
Obsidian Dreams[]
- Badge: Armorer
- Unlocked by: completing the quest "Forge Ahead"
- Objectives:
- craft an Obsidian Breastplate in your crafting menu from 3 Obsidian bars, 2 Stone Rods, 2 pieces of Leather and 2 orange Miru Eyes from bluegreen common Mirus
- craft 1x Obsidian Armguards from 1 Obsidian bar, 2 Stone Rods, 2 pieces of Leather and 1 orange Miru Eye
- craft 1x Obsidian Leggings from 2 Obsidian bars, 2 Stone Rods, 2 pieces of Leather and 1 orange Miru Eye
- craft an Obsidian Pauldron from 2 Obsidian bars, 2 Stone Rods, 2 pieces of Leather and 2 orange Miru Eyes
- Rewards: 20 more Obsidian bars, 1 Obsidian Sword and 1 Stone Treasure Chest
- Unlocks: quest "Iron Will"
Green Thumb[]
- Badge: Homesteader
- Unlocked by: completing the quest "Forge Ahead"
- Objectives:
- collect 10 Tallgrass from Grassland, Woodlands, Forests or Swamplands. Savannah Tallgrass can give Wheat Seeds too, but will not count for this part of the quest
- collect 5 Wheat Seeds by harvesting Tallgrass or Savannah Tallgrass, or by processing grown Wheat in a Processor
- Rewards: 20 more Wheat Seeds, 20 Wood Fences and 1 Plow
- Unlocks: quest "Dirt-y Jobs"
Iron Will[]
- Badge: Armorer
- Unlocked by: completing the quest "Obsidian Dreams"
- Objectives:
- craft an Iron Breastplate in your crafting menu from 3 Iron Bars, 2 Obsidian Rods, 2 Twines, 2 Feral Pigsy Furs and 2 Warmworm Teeth
- craft 1x Iron Leggings from 2 Iron Bars, 2 Obsidian Rods, 2 Twines, 2 Feral Pigsy Furs and 2 Warmworm Teeth
- craft 1x Iron Armguards from 1 Iron Bar, 2 Obsidian Rods, 2 Twines, 2 Feral Pigsy Furs and 2 Warmworm Teeth
- craft an Iron Pauldron from 2 Iron Bars, 2 Obsidian Rods, 2 Twines, 2 Feral Pigsy Furs and 2 Warmworm Teeth
- Rewards: 20 Iron Bars, 1 Iron Sword and 1 Obsidian Treasure Chest
- Unlocks: quest "Diamond in the Rough"
Who Turned Off The A/C?[]
- Badge: Cavedweller
- Unlocked by: completing the quest "Iron And Mine"
- Objectives:
- collect 10 Warmworm Teeth by looting or pet-harvesting Warmworms
- collect 10 Diamond Ore for example by extracting it from Diamond Nodes on the Lava layer or from Diamond Nodes created from Coal Nodes with Fire Bombs/Flaming Skulls
- craft a Diamond Mining Cell in your crafting menu from 4 Diamond bars, 2 Iron Slabs, 4 blocks of Tourmaline from Warmworms or the Lava layer, 5 blocks of Hardened Lava and 8 blocks of Ice
- Rewards: 5 Super Extractors, 10 Diamond Bars and 10 Grand Arctek Torches
- Unlocks: quest "Purple Haze"
Diamond in the Rough[]
- Badge: Armorer
- Unlocked by: completing the quest "Iron Will"
- Objectives:
- craft a Diamond Breastplate in your crafting menu from 3 Diamond bars, 2 Tempered Iron Bars forged from Iron Bars, 2 Rambeau Tufts from high Mountains, 2 Twines and 2x Corruption Dust from Corrupted Creatures
- craft 1x Diamond Leggings from 2 Diamond bars, 2 Tempered Iron Bars, 2 Rambeau Tufts, 2 Twines and 1x Corruption Dust
- craft 1x Diamond Armguards from 1 Diamond bar, 2 Tempered Iron Bars, 2 Rambeau Tufts, 2 Twines and 1x Corruption Dust
- craft a Diamond Pauldron from 2 Diamond bars, 2 Tempered Iron Bars, 2 Rambeau Tufts, 2 Twines and 2x Corruption Dust
- Rewards: 20 Diamond bars, 1 Diamond Sword and 1 Treasure Chest
- Unlocks: quest "Lumite's Might"
Purple Haze[]
- Badge: Cavedweller
- Unlocked by: completing the quest "Who Turned Off The A/C?"
- Objectives:
- collect 10x Corruption Dust from any Corrupted Creatures that can easily be killed by Mineral Water or by kill-traps filled with Water or Bog Water for this quest
- collect 10 Lumite Ore, for example by extracting it from Lumite Nodes on the Corruption layer
- craft a Lumite Mining Cell in your crafting menu from 4 Lumite bars, 2 Diamond Slabs, 4 Infused Crystals made from Tourmaline in a Forge, 10x Corruption Dust and 2 Cactus Flowers that grow on Cacti
- Rewards: 20 Super Extractors, 10 Lumite Bars and 10 Arctek Lanterns
- Unlocks: Cavedweller Badge that permanently reduces fall damage
Lumite's Might[]
- Badge: Armorer
- Unlocked by: completing the quest "Diamond in the Rough"
- Objectives:
- craft a Lumite Breastplate in your crafting menu from 3 Lumite bars, 2 Diamond Rods, 2 Arcstones from any type of Keepas, 2 Trog Horns from Canyons and 4x Corruption Dust
- craft 1x Lumite Leggings from 2 Lumite bars, 2 Diamond Rods, 1 Arcstone, 2 Trog Horns and 2x Corruption Dust
- craft 1x Lumite Armguards from 1 Lumite bar, 2 Diamond Rods, 1 Arcstone, 2 Trog Horns and 2x Corruption Dust
- craft 1 Lumite Pauldron from 2 Lumite bars, 2 Diamond Rods, 2 Arcstones, 2 Trog Horns and 3x Corruption Dust
- Rewards: 20 Lumite bars, 1 Lumite Sword and 5 Diamond Treasure Chests
- Unlocks: Armorer Badge that reduces physical damage taken from enemy hits
Who's The Chicken?[]
- Badge: Ruffian
- Unlocked by: completing the quest "Let's Go To The Beach"
- Objective: defeat 10 blue-green common Chizzards that spawn during the day on Shores (Shorewood blocks), in Jungles (Wildwood Leaves), in Canyons etc. with a melee Weapon and/or Explosives. Other types of Chizzards like Night Chizzards or Blizzard Chizzards will not count for this quest, neither will any Creatures spawned with a Mob Spawner.
- Rewards: 20 more Chizzard Gizzards and 1 Wood Treasure Chest
- Unlocks: quest "Hot Headed"
Hot Headed[]
- Badge: Ruffian
- Unlocked by: completing the quest "Who's The Chicken?"
- Objective: defeat 10 mouse-like Shrewdshrews with burning tails that spawn on Savannah Grass during the day with a melee Weapon and/or Explosives. Beware of their fire breath! As always, Creatures spawned with a Mob Spawner will not count for quests.
- Rewards: 20 more Shrewdshrew Tails and 1 Wood Treasure Chest
- Unlocks: quest "In Too Deep"
Dirt-y Jobs[]
- Badge: Homesteader
- Unlocked by: completing the quest "Green Thumb"
- Objectives:
- till 10 blocks of Dirt or green Grass or Mud with a Plow (equip this tool that you got from the prior quest and use it on the blocks holding the left mouse button)
- place 10 Wheat Seeds on tilled land soon after tilling. If you want them to grow into Wheat properly, you will have to place Water or Mineral Water or Bog Water (not too much of the latter) adjacent to each tilled land with Seeds on it. The type of moisture will not influence the growth. Light is not necessary, fertilizing (with Pigsy Droppings is purely optional, but the area/Biome has to be sufficient, not too cold or hot (and some areas are simply unsuitable for unknown reasons), otherwise the Seeds will stay fallow (written in red letters) and have to be pulled out to be planted elsewhere
- harvest 10 Wheat ca. 50 minutes (real-life-time) after planting when it's "ripe" within 24 hours for optimal results by pulling it like any other item or block, or harvest it even later when it's "grown" anytime; it will never wither
- Rewards: 20 Turnip Seeds, 50 units of pure Water and 1 Taming Collar
- Unlocks: quests "Farmologist" and "Fresh Baked Bread"
Farmologist[]
- Badge: Homesteader
- Unlocked by: completing the quest "Dirt-y Jobs"
- Objectives:
- tame a common yellow daylight Pigsy with a Taming Collar - equip the collar, stun the Pigsy with Stun Bombs and try to hold the left mouse button while aiming with the cursor at the Pigsy for 5 seconds. Even before the Pigsy ducks and waves its tail, you should use another Stun Bomb to prevent getting thrown in the air which would interrupt the taming process
- feed a yellow Pigsy Pet as long as it is hungry (showing Food in its thought bubble and Pet window), preferably with its exact favorite Food type as shown in the Pet window when activating your pet (right mouse button or "f" as the default key). If you feed your Pets anything else than their favorite Food, for example a simple brown Mushroom or the wrong type of Bread or Pie, the pet harvest might be disappointingly less
- wait a few minutes after feeding, then you can harvest from your Pet by pulling with the gauntlet and holding the right mouse button like when picking up any block, plant or object. As mentioned, Pigsy Droppings (a pet-harvest only, not obtainable as loot after killing) might only be part of the pet-harvest if the Pigsy has been fed its favorite Food
- Rewards: 10 Lettuce Seeds, 20 Wheat oars and 20 more Pigsy Droppings usable as optional fertilizer on Seeds, tree Saplings and/or Seedlings (first growth stage of Seeds)
Fresh Baked Bread[]
- Badge: Homesteader
- Unlocked by: completing the quest "Dirt-y Jobs"
- Objectives:
- craft a Cooking Station in your crafting menu from
- obtain or cook/bake at least one loaf of common Bread by choosing the recipe for all types of Bread in your Cooking Station and then inserting Wheat and common blue Water (or Molasses) into the slots of the Cooking Station. Any other ingredients will produce different types of Bread
- then obtain or cook/bake at least one loaf of Bog Bread by choosing the recipe for all types of Bread in your Cooking Station and then inserting Wheat and Bog Water from Swamplands that can be scooped up with a Diamond Mining Cell or better (Lumite Mining Cell) equipped
- at last obtain or cook/bake at least one loaf of Wholesome Bread by choosing the recipe for all types of Bread in your Cooking Station and then inserting Wheat and Mineral Water from Canyons or the Stalactite layer or made by purifying Corrupted Water that can also be scooped up with a Diamond Mining Cell or better equipped
- Rewards: 20 more loaves of Bread, 20 more loaves of Bog Bread and 20 more loaves of Wholesome Bread
- Unlocks: quest "No Soup For You"
No Soup For You[]
- Badge: Homesteader
- Unlocked by: completing the quest "Fresh Baked Bread"
- Objectives:
- obtain (any type of) Soup like by choosing the recipe for all types of Soup in your Cooking Station and then inserting 2 units of any liquid together with 4 Vegetables (either Crisphead Lettuce or Turnips) and 3 more ingredients like Turnips, Lettuce, Horned Melons, Mushrooms, Chizzard Eggs, Blizzard Chizzard Eggs or Questionable Jerky. Corrupted Soup made from Corrupted Water is very helpful for explorations and hunts on the Corruption layer
- obtain (any type of) Sandwich like by choosing the recipe for all types of Sandwiches in your Cooking Station and then inserting any type of Bread that you have cooked/baked together with 3 Vegetables (either Turnips or Crisphead Lettuce and 3 more ingredients; either Turnips, Lettuce, Horned Melons, Mushrooms, Chizzard Eggs, Blizzard Chizzard Eggs or Questionable Jerky.
- Rewards: 20x Tar Soup (very good Fuel), 20x Blazing Sandwiches, 20x Turnip Sandwiches (with a curative effect)
- Unlocks: Homesteading Badge that permanently reduces cold damage
In Too Deep[]
- Badge: Ruffian
- Unlocked by: completing the quest "Hot Headed"
- Objectives:
- defeat 10 common blue-green Mirus with a melee Weapon and/or Explosives. You can find Mirus on the Fossil layer or Stalactite layer below, but also on the surface at night. As always, Creatures spawned with a Mob Spawner won't count for quests, neither will any other Miru variants. They will burn away when sunlight hits them.
- defeat 10 Night Rocksters with a melee Weapon and/or Explosives. You can find these black Creatures with cyan glowing parts on the Fossil layer and Stalactite layer, but also on Shores on the surface at night. They too will burn away when sunlight hits them.
- Rewards: 20 more Miru Eyes, 20 blocks of Magnetite and 1 Stone Treasure Chest
- Unlocks: quest "Leaf It To Me"
Leaf It To Me[]
- Badge: Ruffian
- Unlocked by: completing the quest "In Too Deep"
- Objectives:
- defeat 10 reddish, orange and/or brownish Autumn Leafies with a melee Weapon and/or Explosives. They spawn during the day around Autumnwood trees, on Autumnwood Leaves and near Fallen Leaves. As always, Creatures spawned with a Mob Spawner won't count for quests.
- defeat 10 Dried Leafies with a melee Weapon and/or Explosives. They spawn during the day around Cacti and also in Canyons, close to oases.
- defeat 10 dark green bubbling Mossy Leafies with a melee Weapon and/or Explosives. They spawn during the day in Swamplands and Jungles, near Bog Water and on Wildwood Leaves. They are poisonous.
- Rewards: 20 more Autumn Leafi Leaves, 20 more Dried Leafi Leaves and 20 more Mossy Leafi Leaves
- Unlocks: quest "Best Served Cold"
Best Served Cold[]
- Badge: Ruffian
- Unlocked by: completing the quest "Leaf It To Me"
- Objectives:
- defeat 10 Blizzard Chizzards with a melee Weapon and/or Explosives. These white-blue hybrids between birds and lizards spawn during the day on blocks of Ice and Snow. As always, Creatures spawned with a Mob Spawner won't count for quests.
- defeat 10 goat-like bright blue Rambeaus with a melee Weapon and/or Explosives. They spawn during the day mainly on or near Peakstone
- defeat 10 bright blue Arctic Mirus with a melee Weapon and/or Explosives. They spawn during the night or in darkness on blocks of Ice and Snow, but also on or near Peakstone. They will burn away when sunlight hits them.
- Rewards: 20 more Rambeau Tufts, 20 more Blizzard Chizzard Gizzards and 20 more Arctic Miru Eyes
- Unlocks: quest "The Night's Watch" and Ruffian Badge that grants player characters healing for 8 seconds if their health drops below 30%
The Night's Watch[]
- Badge: Brawler
- Unlocked by: completing the quest "Best Served Cold"
- Objectives:
- defeat 5 black and bright blue Night Twiggies with a melee Weapon and/or Explosives. These round-eyed little animals spawn during the night in Woodlands and Forests, only rarely in Grasslands, Tundras and just very rarely on artificial Biomes. They will burn away when sunlight hits them.
- defeat 5 black and green Night Hoglets with a melee Weapon and/or Explosives. These small and weak Pigsy-variants spawn during the night in Woodlands and Forests just like Night Twiggies, not often in Grasslands, Tundras and rather rarely on artificial Biomes (not as rarely as Night Twiggies though). They too will burn away when sunlight hits them.
- Rewards: 20 Coal Torches and 1 Stone Treasure Chest
- Unlocks: quest "Things That Go Bump"
Things That Go Bump[]
- Badge: Brawler
- Unlocked by: completing the quest "The Night's Watch"
- Objectives:
- defeat 5 black and green Night Pigsies with a melee Weapon and/or Explosives. They spawn during the night on the surface in many Biomes, but also on the Fossil layer and Stalactite layer even during the day. They will burn away when sunlight hits them. Again, other variants or Creatures spawned on a Mob Spawner will not count.
- defeat 5 black and cyan Night Leafies with a melee Weapon and/or Explosives. They spawn during the night on many types of tree Leaves, most often in Forests, Woodlands, Grassland, Jungles and Swamplands, on top of the trees as well as on the ground. They too will burn away when sunlight hits them.
- defeat 5 black and green Night Chizzardes with a melee Weapon and/or Explosives. They spawn during the night on Shores, in Jungles, in Tundras, as well as more rarely in Canyons close to oases and in Taigas on the trees. They will also burn away when sunlight hits them.
- Rewards: 20 Wood Burning Lamps and 1 Obsidian Treasure Chest
- Unlocks: quest "Hogging The Glory"
Hogging The Glory[]
- Badge: Brawler
- Unlocked by: completing the quest "Things That Go Bump"
- Objectives:
- defeat 10 aggressive red Feral Pigsies with a melee Weapon and/or Explosives. They spawn during the day on blocks of Detritus in Jungles and near Bog Water in Swamplands. Again, other Pigsy variants or Creatures spawned on a Mob Spawner will not count.
- defeat 10 aggressive yellow BossHogs with a melee Weapon and/or Explosives. They spawn during day and night on Savannah Grass
- Rewards: 20 more Feral Pigsy Furs, 20 more BossHog Tusks and 1 Obsidian Treasure Chest
- Unlocks: quest "Anything You Canyon Do..."
Anything You Canyon Do...[]
- Badge: Brawler
- Unlocked by: completing the quest "Hogging The Glory"
- Objectives:
- defeat 10 bonepile-like aggressive Dustevils with a melee Weapon and/or Explosives. They spawn during the day in Canyons on almost any type of Canyonstone (including Ruddy Canyonstone, Dark Canyonstone and Sandstone), as well as near or on Cactus blocks. Once again, Creatures spawned on a Mob Spawner will not count for quests.
- defeat 10 brown large aggressive Trogs with a melee Weapon and/or Explosives. They spawn during the day on most types of Canyonstone, but more rarely than Dustevils.
- Rewards: 20 more Dustevil Dusts, 20 more Trog Horns and 1 Obsidian Treasure Chest
- Unlocks: quest "Let Your Lava Flow"
Let Your Lava Flow[]
- Badge: Brawler
- Unlocked by: completing the quest "Anything You Canyon Do..."
- Objectives:
- defeat 10 hopping agressive Hot Feet with a melee Weapon and/or Explosives. They spawn during night and day on Lava layer blocks in darkness. They will burn away when sunlight hits them. Again, Creatures spawned on a Mob Spawner will not count for quests.
- defeat 10 immobile lava-spitting Warmworms with a melee Weapon and/or Explosives. They spawn during day and night in dark places on Stalactite layer blocks and Lava layer blocks, and can withstand sunlight.
- Rewards: 20 more Warmworm Teeth, 20x Iron Ore and 1 Diamond Treasure Chest
- Unlocks: quest "Power Corrupts"
Power Corrupts[]
- Badge: Brawler
- Unlocked by: completing the quest "Let Your Lava Flow"
- Objectives:
- defeat 10 black and violet aggressive Corrupted Pigsies with a melee Weapon and/or Explosives. They spawn during day and night on Corrupted Blocks in darkness. Again, other variants or Creatures spawned on a Mob Spawner will not count.
- defeat 10 black and violet aggressive Corrupted Leafies with a melee Weapon and/or Explosives. They spawn during day and night on Corrupted Blocks in darkness, preferably on Corrupted Leaves.
- defeat 10 black and violet aggressive Corrupted Chizzards with a melee Weapon and/or Explosives. They spawn during day and night on Corrupted Blocks in darkness.
- Rewards: 20 more units of Corruption Dust, 10 Corruption Resistance Potions and 1 Diamond Treasure Chest
- Unlocks: quest "It Was Nothing"
It Was Nothing[]
- Badge: Brawler
- Unlocked by: completing the quest "Power Corrupts"
- Objectives:
- defeat 10 black and violet aggressive Corrupted Mirus with a melee Weapon and/or Explosives. They spawn during day and night on Corrupted Blocks in darkness. Again, other variants or Creatures spawned on a Mob Spawner will not count.
- defeat 10 black and violet aggressive Corrupted Rocksters with a melee Weapon and/or Explosives. They spawn during day and night on Corrupted Blocks in darkness.
- defeat 1 aggressive and very tough violet and pale-green Thing with a melee Weapon and/or Explosives. It spawns during day and night on Corrupted Blocks in darkness.
- Rewards: 30 more units of Corruption Dust, 50 Lumite Ore and 5 Diamond Treasure Chests
- Unlocks: quest "Oooh, Shiny!"
Oooh, Shiny![]
- Badge: Brawler
- Unlocked by: completing the quest "It Was Nothing"
- Objectives:
- defeat 20 common bright blue Keepas that can randomly spawn anywhere, with a melee Weapon and/or Explosives. As always, Creatures spawned on a Mob Spawner will not count.
- defeat 10 common blueish white Silver Keepas that have a white vapor and can randomly spawn anywhere with a melee Weapon and/or Explosives. They most often appear in Caves deep underground, like on the Stalactite layer and Lava layer.
- defeat 5 common yellow Golden Keepas that have a yellow vapor and can randomly spawn anywhere with a melee Weapon and/or Explosives. They will appear most often on Corrupted Blocks and also in Caves deep underground, like on the Stalactite layer and Lava layer.
- Rewards: 200 Lumite Ore, 200 Iron Ore and 5 Diamond Treasure Chests
- Unlocks: Brawler Badge that grants player characters random critical hits that will inflict more damage while fighting with a melee Weapon
Badge: Rancher[]
Fall For You[]
- Badge: Rancher
- Unlocked by completing another quest
- Objectives:
- Tame an Autumn Leafi by equipping a Taming Collar, readying it and pointing it at an Autumn Leafi (that spawns in Forests next to autumnally colored Autumnwood trees during the day) for 5 seconds. This Leafi variant will defend itself as soon as you attempt to tame it, but not overly fiercely.
Tips for taming: you might either want to use Stun Bombs in order to prevent the taming process from being interrupted by being hit, or you could build a trap. Simply build a small closed-up vertical box with a destination teleporter on top of the hollow inside that does not even have to be larger than a shaft of only 1 block in width.
The bottom of teleporters is not solid for Creatures, it will let Creatures fall downwards through it as soon as they are teleported in. So if you lure a Creature into a departure teleporter (not too far from the trap) with the same upper code as the destination teleporter's lower code, they will fall into the trap.
Best use fences, rotated slabs or any type of blocks that have small holes in them as the bottom of the trap. You can then stand below the trap and safely tame the Creature through the fences or holes of the bottom of the trap. Creatures can hit you through small holes if you stand on the other side, but not if you stand right below them.
- Tame an Autumn Leafi by equipping a Taming Collar, readying it and pointing it at an Autumn Leafi (that spawns in Forests next to autumnally colored Autumnwood trees during the day) for 5 seconds. This Leafi variant will defend itself as soon as you attempt to tame it, but not overly fiercely.
- Rewards: 20 Citrus Autumnwood Leaves, 20 Autumnwood Flowers and 1 Pet Washer
- Unlocks: quest "Who's the Boss?"
Who's the Boss?[]
- Badge: Rancher
- Unlocked by: completing the quest "Fall for you"
- Objectives:
- Tame a BossHog by equipping a Taming Collar, readying it and pointing it at a reluctantly aggressive BossHog (that spawns in Savannah biomes during day and night) for 15 seconds.
The use of Stun Bombs or even better a trap (like described in the quest hints for "Fall for you") is highly recommended, since BossHogs can easily interrupt the taming process by pushing player characters high up and backwards. To prevent your character from being flung up, you can try standing in (shallow) water or any other liquid. - Wash a BossHog Pet with the Washer after harvesting.
After taming a BossHog, you will first have to feed it when it's hungry and displays the food icon in its thought bubble and Pet window (right-click while pointing your cursor at the Pet per default). It's always recommendable to feed your Pets their exact (!) favorite type of Food as shown in their Pet window. Only then they will provide you with their best harvest.
Pets will need a few minutes to digest the food, then the thought bubble and Pet window will display an ArcTek Gauntlet (or rather a Mining Cell). Now you can "pull" the Pets (left mouse button by default) like you would mine/pick up any block.
Afterwards, all Pets need a good cleaning before they can get hungry again. Some Pets like BossHogs even appear dirty very visibly. Equip a Washer, point it at the Pet and hold the left mouse button (by default) for 3 seconds until the bar has filled.
- Tame a BossHog by equipping a Taming Collar, readying it and pointing it at a reluctantly aggressive BossHog (that spawns in Savannah biomes during day and night) for 15 seconds.
- Rewards: 20 BossHog Tusks, 20 Pigsy Droppings and 20 Melon Sandwiches
- Unlocks: quest "Ring the Bell, DeVoe"
Ring the Bell, DeVoe[]
- Badge: Rancher
- Unlocked by: completing the quest "Who's the Boss?"
- Objectives:
- Craft a Poison Resistance Potion (or rather 2 of them) in your Crafting Menu. The crafting recipe for this potion is unlocked by crafting or finding a Basic Health Potion, obtaining Feral Pigsy Fur from Feral Pigsies (in Jungles or Swamplands), collecting Wildwood Flowers from Wildwood Jungle trees and collecting Detritus from the ground of Jungle biomes. 2 Poison Resistance Potions can then be crafted with 2 Wildwood Flowers, 1 Feral Pigsy Fur and 8 (blocks of) Detritus
- Tame a Mossy Leafi by equipping a Taming Collar, readying it and pointing it at a defensive Mossy Leafi (that spawns in Swampland biomes and sometimes Jungles too during the day) for 5 seconds.
The use of Stun Bombs or even better a trap (like described in the quest hints for "Fall for you") is recommended, since Mossy Leafies are able to occasionally deal poison damage over time. - Tame a Feral Pigsy by equipping a Taming Collar, readying it and pointing it at an aggressive Feral Pigsy (that spawns in Jungle biomes and Swamplands during the day) for 7,5 seconds.
The use of Stun Bombs or even better a trap (like described in the quest hints for "Fall for you") is highly recommended, since Feral Pigsies not only deal poison damage over time rather often, they also can push your player character upwards and backwards. Standing in Bog Water or any other liquid might prevent from being pushed.
- Rewards: 20 Feral Pigsy Furs, 20 Mossy Leafi Leaves and 20 Wildwood Flowers
- Unlocks: quest "A Rocky Relationship"
A Rocky Relationship[]
- Badge: Rancher
- Unlocked by: completing the quest "Ring the Bell, DeVoe"
- Objectives:
- Tame a Trog by equipping a Taming Collar, readying it and pointing it at an aggressive Trog (that spawns in Canyon biomes during the day) for 5 seconds.
The use of Stun Bombs or even better a trap (like described in the quest hints for "Fall for you") is highly recommended, since Trogs have a long reach and can strongly push your player character backwards. Standing in Water or any other liquid might prevent from being pushed. - Tame a Dustevil by equipping a Taming Collar, readying it and pointing it at an aggressive Dustevils (that spawns in Canyon biomes during the day) for 5 seconds.
The use of Stun Bombs or even better a trap (like described in the quest hints for "Fall for you") is highly recommended, since Dustevils can hurl your player character really high up in the air. Standing in Water or any other liquid might prevent your player character from being pushed.
- Tame a Trog by equipping a Taming Collar, readying it and pointing it at an aggressive Trog (that spawns in Canyon biomes during the day) for 5 seconds.
- Rewards: 20 Trog Horns, 20x Dustevil Dust and 20 Stun Bombs
- Unlocks: quest "Ice To Meet You"
Ice To Meet You[]
- Badge: Rancher
- Unlocked by: completing the quest "A Rocky Relationship"
- Objectives:
- Tame an Arctic Miru by equipping a Taming Collar, readying it and pointing it at an aggressive Arctic Miru (that spawns on Snow, Ice and Peakstone in biomes like Frozen Oceans, Frozen Deserts, Taigas, snowy Tundras, snowy Mountains or (rarely) snowy Canyons during the night or in complete darkness) for 7,5 seconds.
The use of Stun Bombs or even better a trap (like described in the quest hints for "Fall for you") is recommended, since Arctic Mirus can use a blinding attack that will usually interrupt the taming process. - Tame a Blizzard Chizzard by equipping a Taming Collar, readying it and pointing it at a defensive Blizzard Chizzard (that spawns on Snow and Ice in cold biomes like Frozen Oceans, Frozen Deserts, Taigas, snowy Tundras, snowy Mountains or (rarely) snowy Canyons during the day) for 5 seconds.
The use of Stun Bombs or even better a trap (like described in the quest hints for "Fall for you") is recommended, since Blizzard Chizzards cannot only deal cold damage over time, they can also push your player character away. Even as soon as they just start to use their dive attack, the taming process is often already interrupted. - Build an Ice Home with 50 Ice blocks. You can collect Ice from Frozen Oceans (there's usually a layer of thin flat Snow on top), or from frozen rivers in many cold biomes, or you can simply place units of Water or Bog Water into cold biomes high up, like on the top of snow-covered Mountains so that the liquid will freeze to Ice. Actually, you do not really have to build a house-like structure at all, you can simply place the 50 blocks of Ice wherever and however you like, and it might even be possible to place just one block of Ice 50 times...
- Tame an Arctic Miru by equipping a Taming Collar, readying it and pointing it at an aggressive Arctic Miru (that spawns on Snow, Ice and Peakstone in biomes like Frozen Oceans, Frozen Deserts, Taigas, snowy Tundras, snowy Mountains or (rarely) snowy Canyons during the night or in complete darkness) for 7,5 seconds.
- Rewards: 20 Arctic Miru Eyes, 20 Blizzard Chizzard Gizzards and 20 Freeze Resistance Potions
- Unlocks: quest "Burning For You"
Burning For You[]
- Badge: Rancher
- Unlocked by: completing the quest "Ice To Meet You"
- Objectives:
- Tame an Hot Foot by equipping a Taming Collar, readying it and pointing it at an aggressive Hot Foot (that spawns on Lava layer blocks like Hardened Lava, Igneous Rocks, Sulfur and Diamond Nodes) for 10 seconds.
The use of Stun Bombs or even better a trap (like described in the quest hints for "Fall for you") is recommended, or at least consuming any type of Food that prevents or even reverses fire damage. Fire Resistance Potions only reduce fire damage for 50%. - Tame a Warmworm by equipping a Taming Collar, readying it and pointing it at an aggressive immobile Warmworm (that spawns on Lava layer blocks like Hardened Lava, Igneous Rocks, Sulfur and Diamond Nodes) for 10 seconds.
It is recommended to place any type of block right in front of the Warmworm and then to tame it across the block while standing on the other side of the block. The lava "fountains" of Warmworms does not set flammable blocks on fire. - Build a Lava Jacuzzi with 10 units of liquid Lava. Equip a Diamond Mining Cell and either scoop up liquid Lava from pools that you can find on the Lava layer or produce Lava yourself by throwing Fire Bombs or Flaming Skulls on Hardened Lava blocks or by performing a Gauntlet Smash on Hardened Lava blocks. For this quest, it does not really matter how or where you place the liquid Lava. The fire damage of Hot Feet does not set flammable blocks on fire (different to Shrewdshrews' attacks).
- Tame an Hot Foot by equipping a Taming Collar, readying it and pointing it at an aggressive Hot Foot (that spawns on Lava layer blocks like Hardened Lava, Igneous Rocks, Sulfur and Diamond Nodes) for 10 seconds.
- Rewards: 20 units of Gunpowder, 20 Warmworm Teeth and 20 Fire Resistance Potions
- Unlocks: quest "Slumber Party"
Slumber Party[]
- Badge: Rancher
- Unlocked by: completing the quest "Burning For You"
- Objectives:
- Tame a Night Chizzard by equipping a Taming Collar, readying it and pointing it at an aggressive Night Chizzard (that spawns on Shores, around Wildwood trees in Jungles and in Tundras only at night in dark areas) for 7,5 seconds.
The use of Stun Bombs or even better a trap (like described in the quest hints for "Fall for you") is recommended, since Night Chizzards will use a dive attack frequently, and even as soon as they start to fly up, the taming process is often already interrupted. - Tame a Night Pigsy by equipping a Taming Collar, readying it and pointing it at an aggressive Night Pigsy (that spawns in many biomes like Forests, Grasslands, Swamplands, Woodlands, Savannahs, Canyons or snowless Tundras in dark areas at night, but also during the day in the darkness of Caves in the Fossil layer and Stalactite layer not far underground) for 7,5 seconds.
The use of Stun Bombs or even better a trap (like described in the quest hints for "Fall for you") is recommended, since Night Pigsies can push your player character backwards and upwards, which will interrupt the taming process. - Tame a Night Rockster by equipping a Taming Collar, readying it and pointing it at an aggressive Night Rockster (that spawns on Shores at night in dark areas, but also during the day in the darkness of Caves in the Fossil layer and Stalactite layer not far underground) for 7,5 seconds.
The use of Stun Bombs or even better a trap (like described in the quest hints for "Fall for you") is recommended, since the spin attack of Night Rocksters will push your player character backwards, which will interrupt the taming process. - Place 10 LEDs for your Night Club. First unlock the crafting recipe for LEDs by crafting or obtaining Wood Burning Lamps, crafting a Wiring Tool, and crafting at least one Switch. Then craft 2 LEDs at a time with 4 Stone Slabs, 2x Coal and 4 Glass blocks. You can place one LED, pick it up again and repeat it 10 times in total. Industrial LEDs, LED Tree Blocks or other LEDs will not count for this quest though.
- Tame a Night Chizzard by equipping a Taming Collar, readying it and pointing it at an aggressive Night Chizzard (that spawns on Shores, around Wildwood trees in Jungles and in Tundras only at night in dark areas) for 7,5 seconds.
- Rewards: 20 Arcstones, 1 placeable Diamond Treasure Chest, 1 Red Party Hat, 1 Yellow Party Hat and 1 Blue Party Hat
- Unlocks: quest "Thing 1 & Thing 2"
Thing 1 & Thing 2[]
- Badge: Rancher
- Unlocked by: completing the quest "Slumber Party"
- Objectives:
- Tame 2 Things by equipping a Taming Collar, readying it and pointing it at one aggressive Thing after another (that spawn on Corrupted Blocks of all kinds, so mainly on the Corruption layer deep underground) for 30 seconds.
The use of Stun Bombs or even better a trap (like described in the quest hints for "Fall for you") is recommended, since the taming process takes quite long and the Thing hits hard, even though it will very rarely interrupt the taming process. - Throw 5 Corrupt Bombs. Unlock their crafting recipe by crafting a Lumite Mining Cell, crafting or obtaining Armor-Piercing Bombs and obtaining Corruption Dust from any aggressive Corrupted Creature. Craft 4 Corrupt Bombs at a time from 5 Corrupted Stone blocks mined with at least a Diamond Mining Cell, 2x Corruption Dust, 2x Gunpowder and 1 Bar of Lumite, made from Lumite Ore that can solely be extracted from Lumite Nodes on the Corruption layer.
- Clean Corruption by placing 3 Healing Beacons. Actually, the quest does not check where exactly you place the beacons and if they really purify any corrupted blocks or corrupted water. Unlock the crafting recipe for Healing Beacons by crafting or obtaining a Diamond Mining Cell, crafting White Beacons (after obtaining Coal and forging Glass), collecting Corruption Dust and then craft 2 Healing Beacons at a time with 2 Obsidian Slabs, 2x Corruption Dust, 10 (blocks of) Stalactite mined with at least an Obsidian Mining Cell on the Stalactite layer, 2 Trog Horns and 4 Iron Rods made of Iron Bars in a Processor.
- Tame 2 Things by equipping a Taming Collar, readying it and pointing it at one aggressive Thing after another (that spawn on Corrupted Blocks of all kinds, so mainly on the Corruption layer deep underground) for 30 seconds.
- Rewards: 20 Lumite bars, 2 placeable Diamond Treasure Chests and 20 Corruption Resistance Potions
- Unlocks: quest "Friendzilla"
Friendzilla[]
- Badge: Rancher
- Unlocked by: completing the quest "Thing 1 & Thing 2"
- Objectives:
- Place 30 Obsidian Brick Walls. Or place even more to be safe - in the shape of a thin flat plane.
- Place 10 Sand Blocks. Actually, tests have shown that Sand blocks by themselves will NOT make Rockzilla spawn, instead Seashells can help with summoning Rockzilla. Seashells will spawn over time on blocks of Sand, albeit slowly. In order to summon Rockzilla faster, you might rather want to place 10-20 blocks of either Corals, Shorewood, Shorewood Husk, Shorewood Leaves, Driftwood or Seashells that you have collected yourself from Shores. And of course you'll have to place them adjacently to the Obsidian Brick Walls, not somewhere far away.
- Place 5 Torches. The quest reacts to Coal Torches. Better place 10 of them and place them either directly on the Obsidian Brick Walls, or at least adjacent to these blocks. However, you can use nearly any crafted luminaires in order to "summon" Rockzilla.
- Wait for Rockzilla to spawn and tame it. Please note that Rockzilla will not spawn at night and not all biomes/areas seem to be suitable for Rockzilla. Also, do not build Rockzilla's altar too close to your touchstone. Don't stay in the area, but walk a few biomes further away, use a bed to let the next day spawn before you return. Try it once again a lot later - do not visit and re-visit the altar too often. If Rockzilla does not spawn within a reasonable timespan, try building an altar somewhere else. In some areas, it might take really long - maybe even a full RL day - until the giant crab spawns, in other areas it might spawn after building the altar, leaving the area and returning right away...
- Rewards: 3 Diamond Treasure Chests and 1 Lumite Mining Cell
- Unlocks: Rancher Badge that will reduce the timespan for taming drastically for all tameable Creatures
Please note that you might have to relog (exit the game, wait for a few minutes, log in again) in order to complete the quest "Friendzilla" and be granted the Badge properly.
QB Quotes[]
QB has some sayings in store whenever you login or logout to the main menu of Creativerse:
"Welcome to Creativerse. Stay a while, stay forever!"
"Glad to have you back, Creator!"
"Hey, Creator! Over here! Hey!"
"Did you miss me as much as I missed you?"
"A long time ago, in a galaxy far, far away, you met me, QB!"
"QB loves you and is glad to see you again!"
"(Hey) What are we doing today, Creator?"
"How is your building coming along?"
"Maximum Effort, Creator!"
"It's explorin' time!"
"Yippy kye yay, Creator!"
"You are the chosen one, Creator! (giggles) Just kidding."
"You're much dreamier than that Steve guy!"
"You smell nice today, Creator."
"Welcome, Creator, have you ever met Kevin Bacon?"
"Do you know what today is? It's the day you played Creativerse! (Yay)"
"You would never drop me into a furnace, would you, Creator?"
"QB loves you, never forget that."
"Do you ever wonder what QB stands for?"
"QB, or not QB, that is the question."
"Never tell QB the odds!"
"Four stam, four strength... green leafy"
"Heat not a forge for your gear so hot that it doth singe yourself."
"I still think Blocky 3 is the best Blocky movie."
"Welcome Creator, can I tell you about my D&D character?"
"Everybody wants to win, but nobody wants to play support."
"It is not in the stars to hold our destiny but in ourselves."
"I will gladly pay you Tuesday for rainbow sherbet today."
"If music be the food of love, play Creativerse!"
"Parting is such sweet sorrow, Creator."
"Our Pigsy shall stand as firm as Rockster mountains."
"So many colors to enjoy, from the Leafi greens to the Pigsy browns!"
"That which we call a Pigsy by any other name would smell as sweet."
"The goo blocks are my favorite! No wait, the placemat. Hmm, or the machines..."
"What's your favorite subject in school? Mine is interplanetary quantum entanglement."
"Creators, assemble!"
"Transform and rollout!"
"(Ah) Uneasy lies the belly that eats too much rainbow sherbet. Worth it!"
"Be excellent to each other, Creators!"
"Kowabunga, Creator-dude!"
"There's a lot to check out. You may never want to leave."
If you should be interested in the origin or inspirations of these quotes and don't want to search the net for them yourself, you can refer to RSoM LuckySheep's findings (not officially confirmed by Playful, but some quotes' origins are very obvious, right?): https://steamcommunity.com/app/280790/discussions/0/1734339901251672581/?ctp=2