

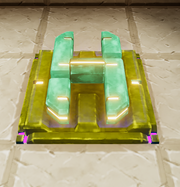
Random Number Generator painted with Yellow 1/Spring Green 1
Basic Information[]
The Random Number Generator is a logic gate that can be wired in between activation devices (for example Number Pads, Industrial Number Pads, Sensors, Switches or Pressure Plates) or other logic gates (including Inverter Gates, Flip-Flop Gates, Delay Gates and/or Number Comparison Gates) and other logic gates or activatable wireable objects, for example doors, trapdoors, wicket gates, block phasers, loot spawners, mob spawners, lamps, beacons or fans. As its name implies, it can be used to generate random numbers.
Random Number Generators will send a random value between its "Min" and "Max" inputs as output when it receives a trigger signal from the "Trigger" input. It can be configured to trigger on either true, false, or both.
How to obtain this Gate[]
Random Number Generators can be crafted in your Crafting Menu, but only after their crafting recipe has been unlocked for free in your Crafting Menu (that can be opened by typing "q" as the default key).
These gates cannot be obtained from any Creatures or randomly spawning Treasure Chests. They can be bought as part of building kits for customizable Blueprints for QBits. Please note that none of these purchases will unlock the crafting recipe in the Crafting Menu.
Unlocking the crafting recipe[]
To unlock the crafting recipe for Random Number Generators for free in your Crafting Menu (to be opened by "q" as the default key), you'll need to craft or obtain:
- one Switch
- one Number Pad, and
- one Number Comparison Gate
How to craft[]
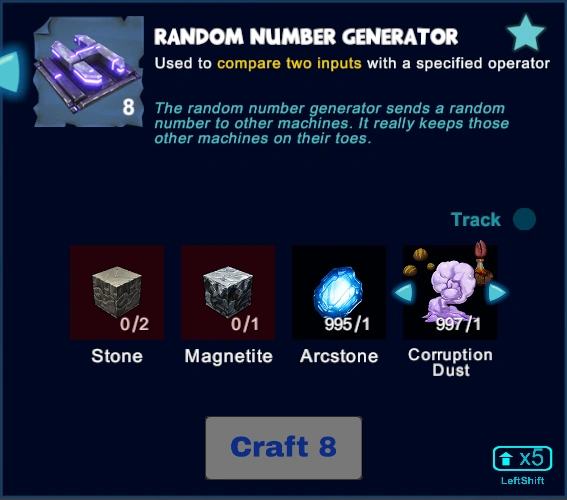
To craft 8 Random Number Generators at a time in your Crafting Menu, you'll need:
- 2 blocks of Stone
- 1 Magnetite mined from the Fossil layer underground (acessible through Caves) or obtained by killing or pet-harvesting Night Rocksters, Warmworms or Rockzillas
- 1 Arcstone obtainable from Keepas of any kind either as loot or pet-harvest
- 1 of either Corruption Dust, Pigsy Droppings, Weepwood Flower, Red Party Hat, Death Statue, Reinforced Glass Slope Inner Corner, Mud or L’Rockster (yes, it's a very random collection - but it is a random number generator, after all)
How to use[]
General usage[]
To use a Random Number Generator, it must be placed into the game world and wired to activation devices (or other gates) and one or more receiving wireable object/s like other gates, doors, wicket gates, trap doors, lamps, beacons, arc signs or machines.
You can fully rotate Random Number Generators into all directions by pointing your cursor at them, then pressing and holding R (as the default key) and then moving the mouse while holding down the left mouse button. The chosen rotation angle can be "locked" too by simply typing "r" while looking at an already rotated item, so that all items of the same stack in the chosen quickslot will then face the same direction when being placed.
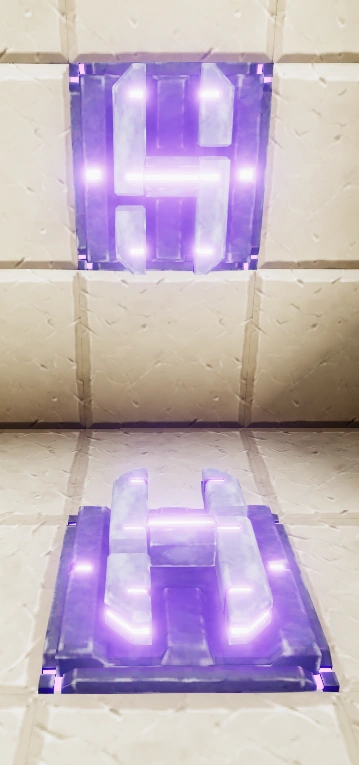
Like most other placeable items, Random Number Generators can be painted, with the primary color influencing the color of the board, and the secondary color influences the color of the H-shaped object on top of the board. They can also be put into displays, where they will be shown at a reduced size.
Random Number Generators can be picked up without the need to equip any Power Cells if you match or outrank the permission level of the gate that has been defined by its owner. Of course you won't be able to pick up such objects on game worlds, on player claims or in Adventures where your Permission rank is not sufficient (mainly when you are merely a visitor), which can only be changed by the owner of the game world, the respective claim owner or Adventure creator.
How to wire[]
To wire Random Number Generators, equip an Wiring Tool and point your cursor at the Random Number Generators that you have placed into the world. Their "Receive" Connectors will become visible then and you will be able to connect them to the "Send" Connector of activation devices and/or of other logic gates. Also wire their "Send" Connector to the "Receive" connector of another wireable device, e.g. another logic gate or an activatable object like a door or lamp. ![]()
![]()
Type "n" (as the default key) to inspect the wiring window of the Random Number Generators if you wish to type a code word into the receiving array that you should then also use in the sending array of the activation device/s to connect them or use non-default trigger settings.
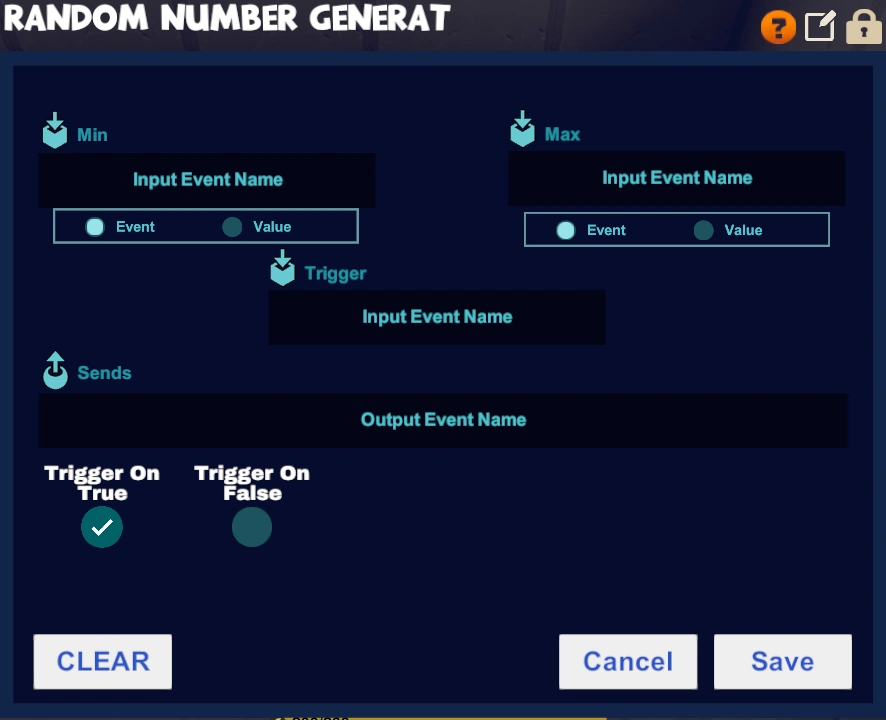
- A Random Number Generator has three input fields: "Min", "Max" and "Trigger", and one output field. It will send the value of its "Value" input as its output when it receives the right "Trigger" input
- "Min" and "Max" fields define the range of values for the random numbers the Random Number Generator generates. The output of the Random Number Generator is always between or equal to the "Min" and "Max" values. Despite their name, it does not acutally matter which of the values is larger - setting the "Min" field to 10 and the "Max" field to 1 will still generate numbers between 1 and 10.
- A Mode is selectable for the "Min" and "Max" inputs, either an Event Mode, where the value comes from some other device (like a Number Pad or other activation device), or a Value Mode, where you can enter a specific number. The minimum valid value in this mode is -2147483648 and the maximum value is 2147483647 (these are the minimum and maximum values of signed 32-bit integers), anything outside that range or non-numeric will be shown as "Invalid" when looked at with the wiring tool and is treated as 0. You most likely will want to use these inputs in the "Value Mode", unless you want to dynamically change the range for your random numbers for some reason.
- The "Trigger" input controls when a new random number is generated. This should be wired to an activation device like a Switch or another logic gate. By default, a new random number is generated when the "Trigger" input receives a "true" signal, but this can be configured using the two checkboxes in the wiring window, "Trigger on true" and "Trigger on false". Checking "Trigger on true" means the gate will trigger when it receives a "true" (non-zero) signal on its "Trigger" input, checking "Trigger on false" means the gate will trigger when it receives a "false" (zero) signal on its "Trigger" input. Checking both means the gate will trigger on both true and false, and unchecking both means the gate will never trigger, making it useless.
- While you can wire a Random Number Generator directly to an activation device such as a door, it is usually more useful to wire it to something that uses numeric input instead of only "true"/"false", e.g. Counters, Number Comparison Gates, Arc Signs or Arc Portals.
- you can write code words into the arrays for "sends" and "receives" and then use these same code words in the correlating arrays of the activation devices and/or the objects that you want to activate/deactivate
 by clicking on this icon, the Random Number Generator can be renamed (30 characters). This can be useful for documenting more complex circuits.
- by clicking on this icon, access to the Random Number Generator can be restricted by changing the permission settings so only players that match or outrank the set permission rank can use or even take the gate
Example: showing a random sprite with an Arc Sign[]
This section gives step-by-step instructions how to wire a Switch, a Random Number Generator and an Arc Sign to display a random sprite (image) when the switch is pulled:
- Equip a Wiring Tool and place the Switch, Random Number Generator and Arc Sign in front of you (or where-ever you want)
- Aim at the Switch and press "n" to open the wiring window. Write "switch_output" (or any other name you want) in the "Sends" field and save.
- Aim at the Random Number Generator and press "n" to open the wiring window. Set the fields as follows:
- Write "0" in the "Min" field and set it to "Value" mode (click the text "Value" under the field") - this makes it so that the minimum number the Random Number Generator outputs will be 0.
- Write "1021" in the "Max" field and set it to "Value" mode - this makes it so that the maximum number the Random Number Generator outputs will be 1021, which is how many sprites exist in the icon set the arc sign will use.
- Write "switch_output" (or whatever name you used in the Switch wiring window) in the "Trigger" field - this will connect the Switch to the Random Number Generator, so it would generate a new random number every time the switch is pulled.
- Write "random_number" (or any other name you want) to the "Sends" field
- Leave the "Trigger on true" and "Trigger on false" checkboxes as is - we want a new random number every time the switch is turned on. Alternatively, you can check the "Trigger on false" as well, so the shown sprite would change every time the switch changes position.
- Save your changes.
- Aim at the Arc Sign and press "n" to open the wiring window. Set the fields as follows:
- Write "random_number" (or whatever name you used in the "Sends" field in the Random Number Generator) in the "Input 1" field - this connects the arc sign to the random number generator so it can use the number generated by it.
- Write "<size=8><sprite="icons_00" index={1}>" in the "Output Message" field. The "{1}" part says "use the value from 'Input 1' here", so the number generated by the Random Number Generator will be used as a sprite index.
- Save your changes.
- You are now done - toggle the switch to see the sprite change randomly with each new number generated!
Known bugs[]
- It is not actually possible to enter the maximum value of 2147483647 in the "Min" and "Max" fields in value mode - the interface will not save if you try to use that value.